
Every snowflake is unique, but they all follow the rules of fractal geometry in some way. By using these rules, you can draw a realistic snowflake in just a few steps. Snowflakes drawing is easier than you think!
If you prefer a beautifully designed snowflake without having to draw it yourself, you can find high-quality resources on GraphicRiver and Envato Elements at the end of this tutorial.
How to Plan a Snowflake
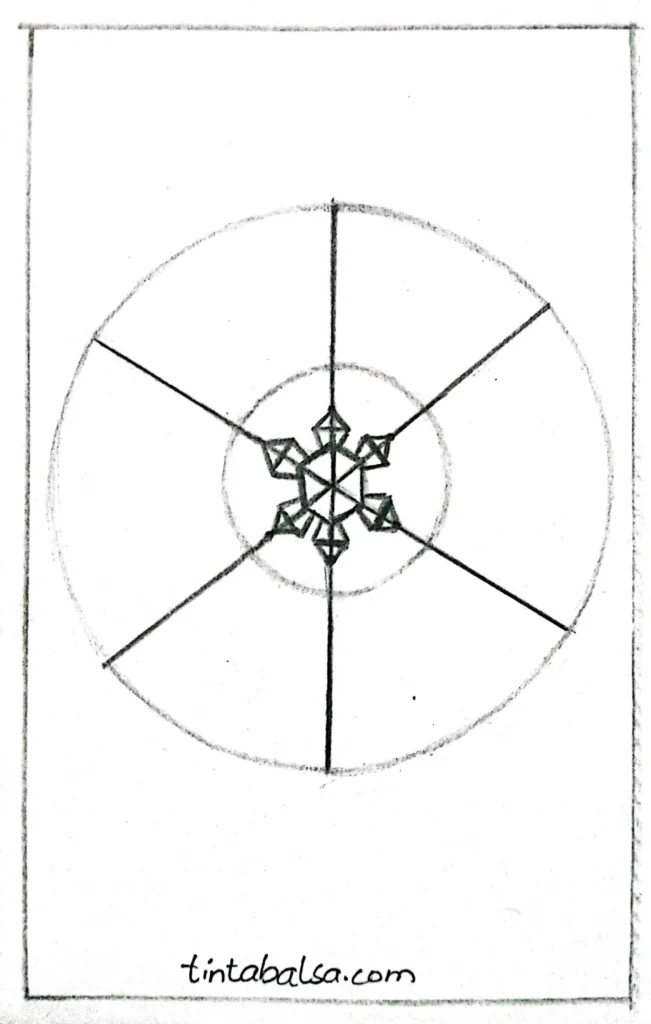
Step 1
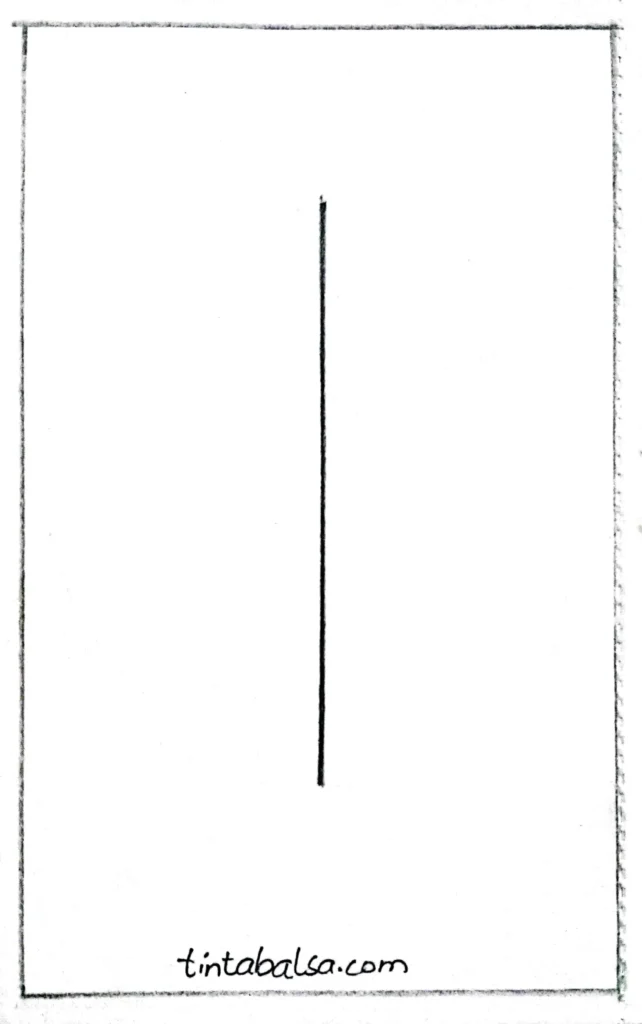
Draw a vertical line and mark its centre. Snowflakes drawing starts with a simple guideline like this to ensure symmetry.
>> Make Spooky & Scary Halloween Drawings easily.
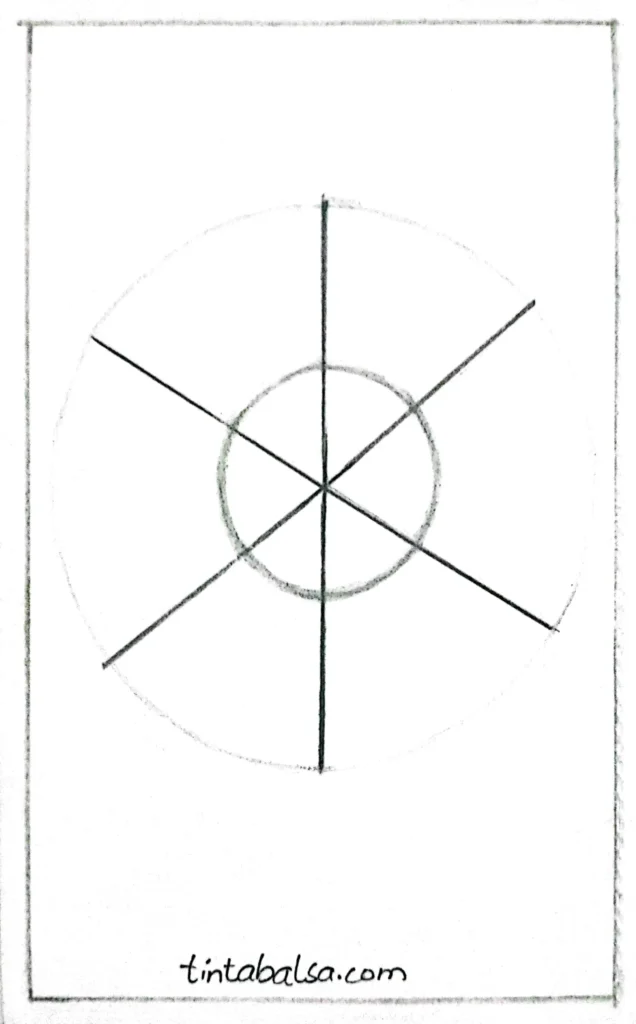
Step 2

Cross the centre with two lines, imagining that it’s a circular pie you want to cut into six parts. You can lightly draw the circle or just visualise it. This is a crucial part of snowflakes drawing to maintain proportion.
>> Enhance your drawing with Summer drawing ideas to draw in summers.
Step 3
Sketch (or imagine, if you prefer to keep it clean) a smaller circle in the centre. This will help create a balanced snowflakes drawing.
>> Draw Aesthetic Drawings You Can Create in Minutes.
Step 4
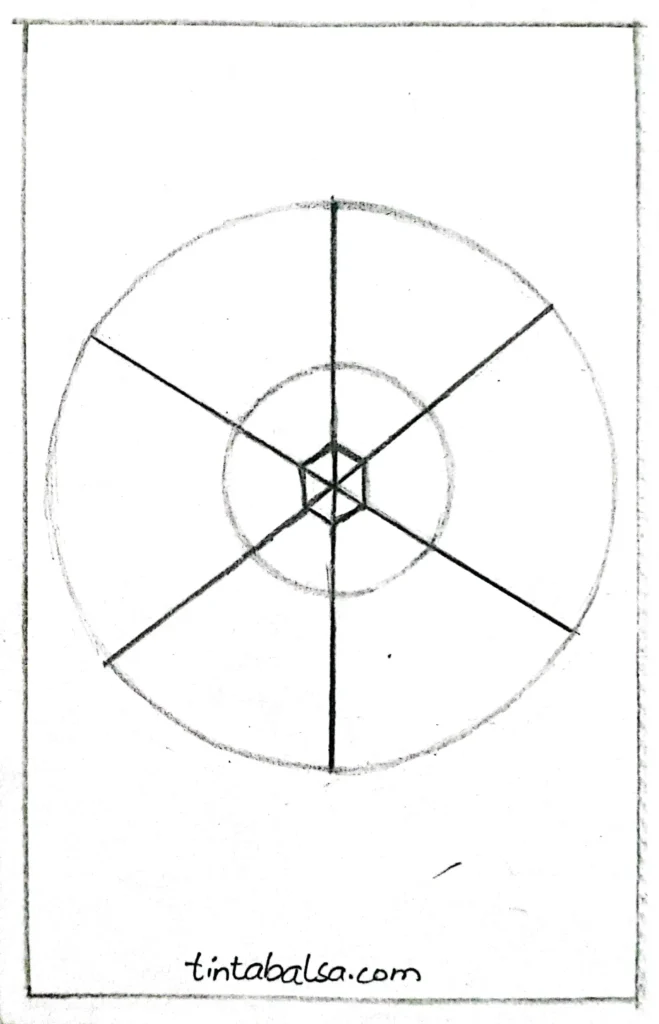
Connect the lines near the centre to form a small hexagon. This hexagon will act as the base for your snowflake.
>> Create cute and small drawings with ease.
Step 5
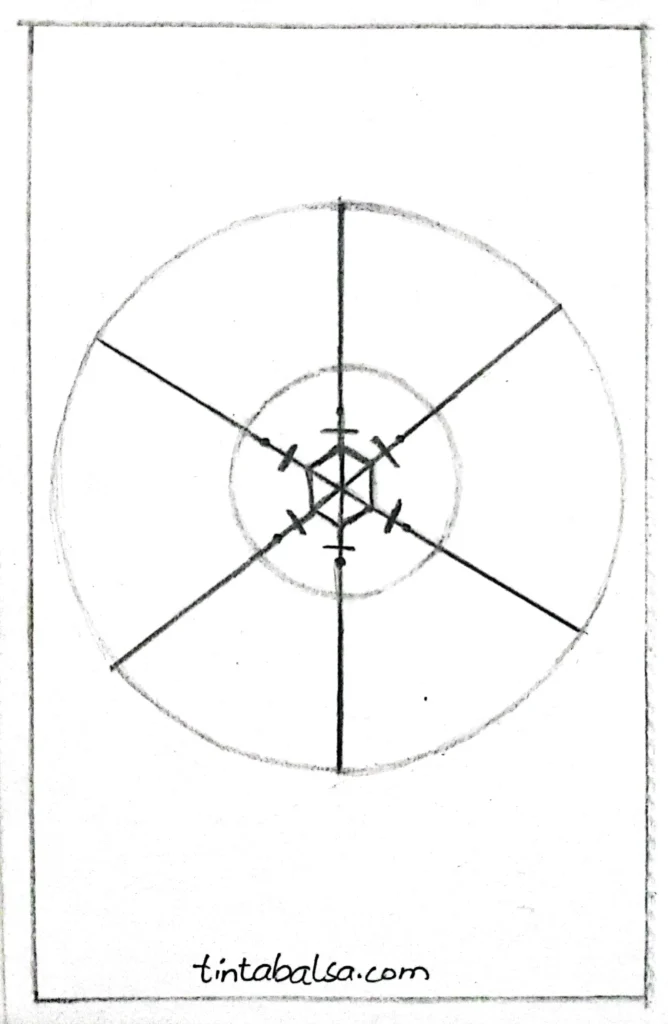
Cross each line with a small horizontal line and add a dot above it. These marks serve as guides for expanding the snowflake’s shape and are vital for precise snowflakes drawing.
>> Comforting Autumn Drawing Ideas to Inspire You.
Step 6
Use these marks as guides to expand the snowflake’s shape. This step gives the snowflake its intricate form, making snowflakes drawing a creative process.
>> Enhance your drawing skills with colourful drawings and bring colours to the world.
Step 7

The main body of the snowflake is now complete, so you can add the “arms.” Remember to keep the symmetry, which is essential for accurate snowflakes drawing.
>> Learn Simple Landscape drawings easily & enhance your skills.
Step 8
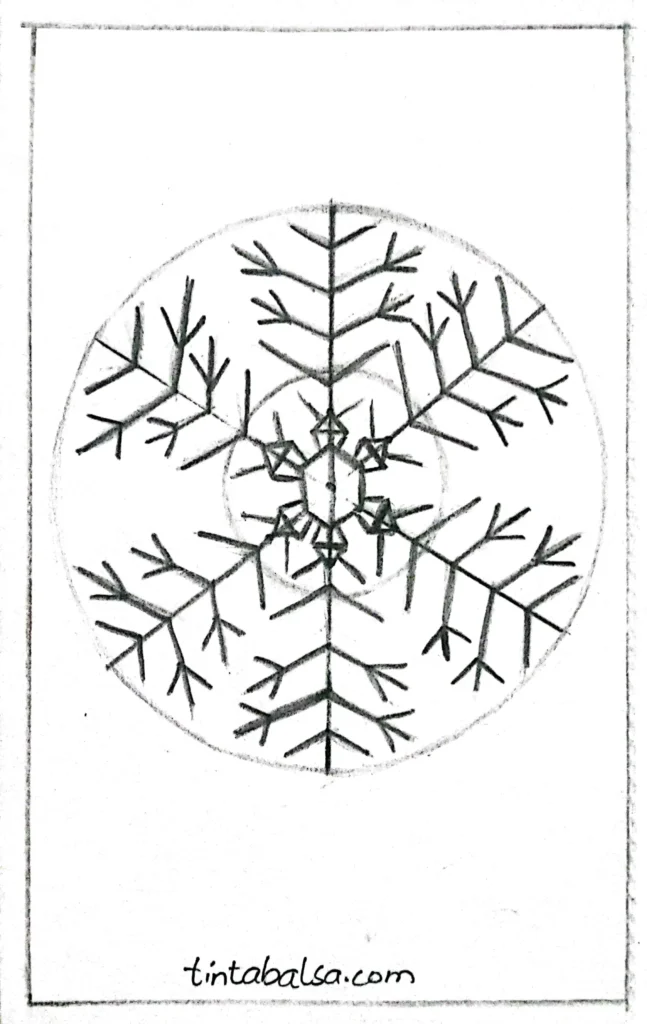
Add more arms to the ends of the smaller circle. This adds complexity and depth to your snowflakes drawing.
>> Learn to draw Dog Drawings easily for beginners.
How to Draw a Snowflake
Step 1
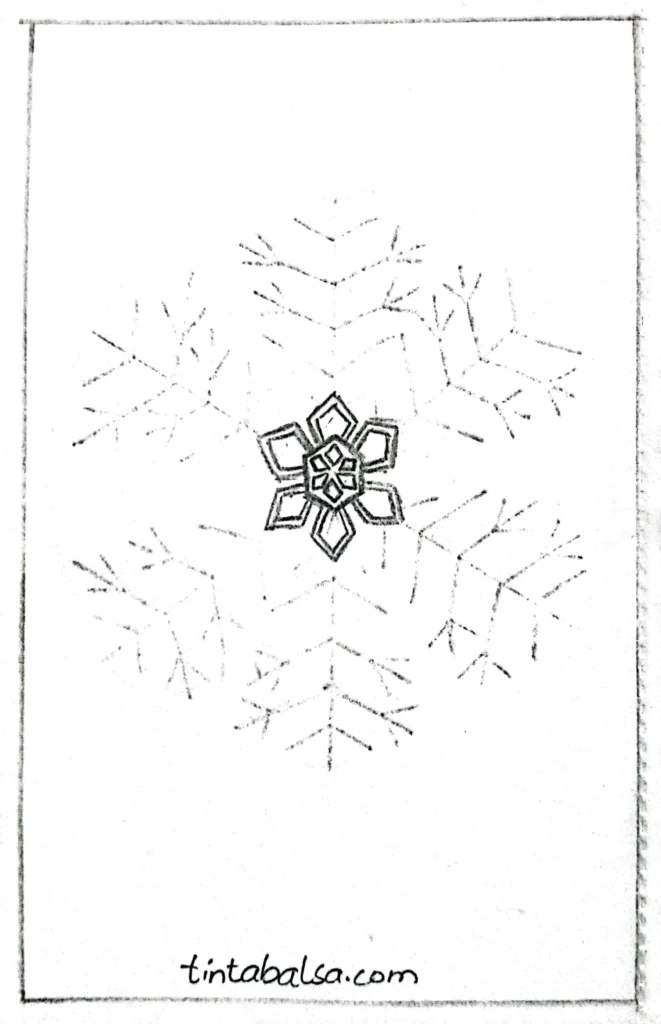
Now that the basic structure is ready, you can start shaping it to create a beautiful snowflake. You can place a new sheet over the guidelines for a clean drawing or use a darker tool to outline the final lines. Begin by outlining the body of the snowflake. Snowflakes drawing becomes easier with clear outlines. Add any details you like at this stage.
>> Draw Quick & Easy pretty drawings perfect for any skill level
Step 2
Outline the arms, giving them thickness and a crystalline shape. This is where snowflakes drawing gets more intricate and detailed.
>> Draw beautiful Flower Drawings to enhance your inner artist skills.
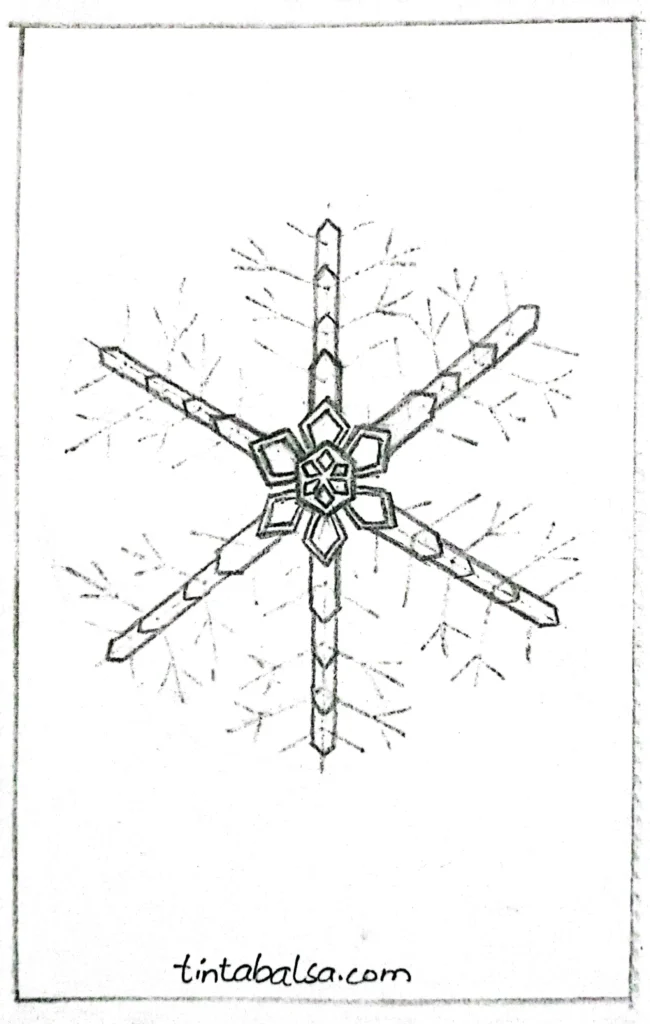
Step 3
Add smaller arms using the same shapes. These details enhance the symmetry and realism of your snowflakes drawing.
>> Explore creative animal drawing ideas to inspire your next artistic project.
Step 4
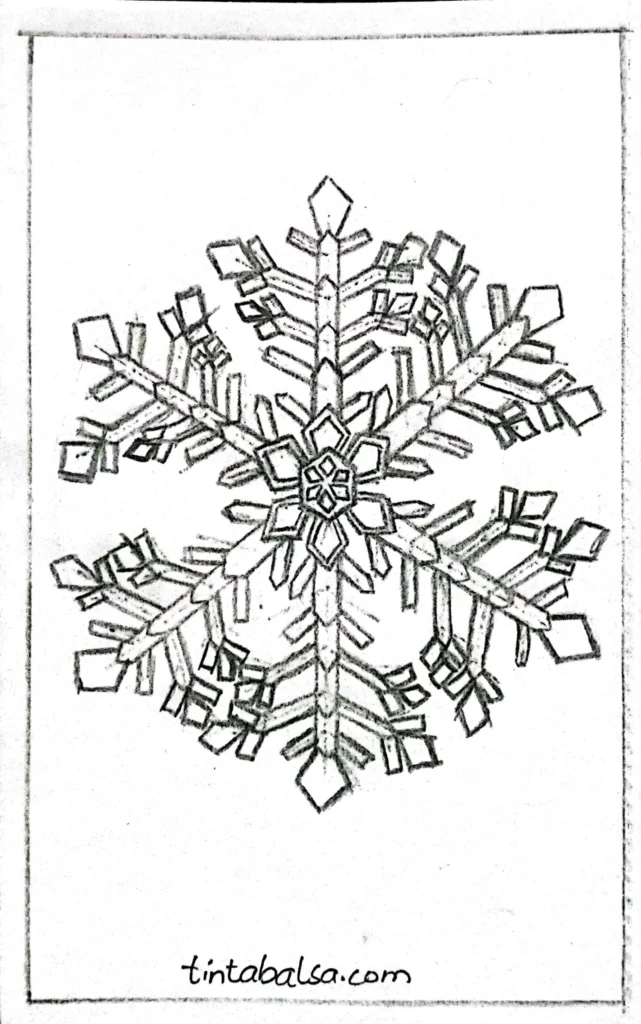
Finish the arms with more interesting shapes. This step allows for creativity while maintaining the structure of your snowflakes drawing.
>> Quick and Easy Drawings to Draw for beginners to get started.
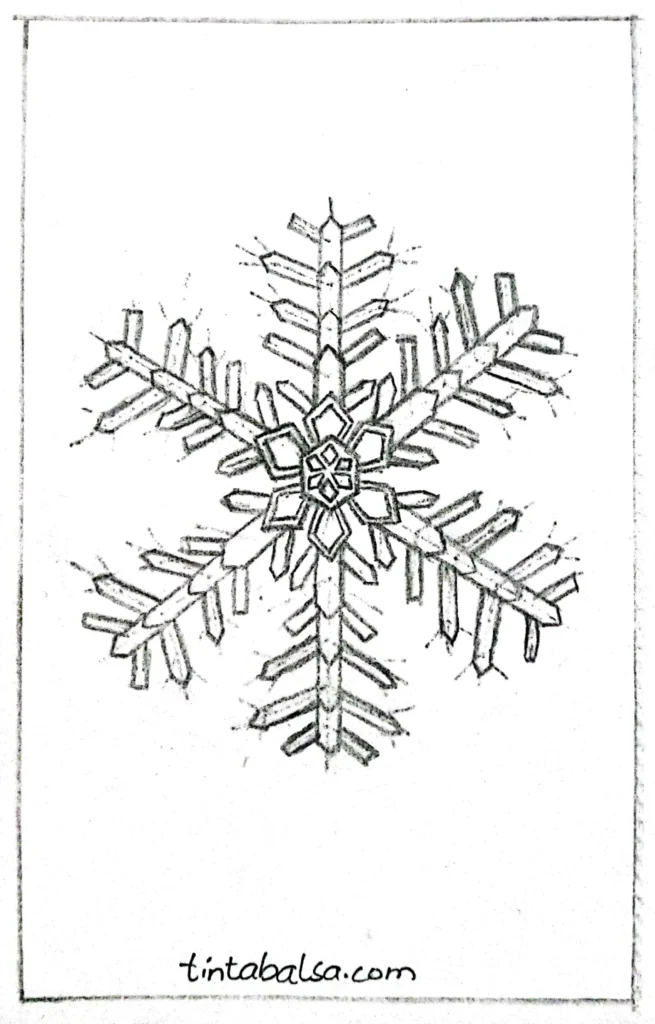
Step 5

You can leave it as it is or add more crystals inside the smaller circle. Adding these details makes your snowflakes drawing stand out.
>> Draw the beauty of winter with snow and cosy scenes Winter Drawings.
Step 6
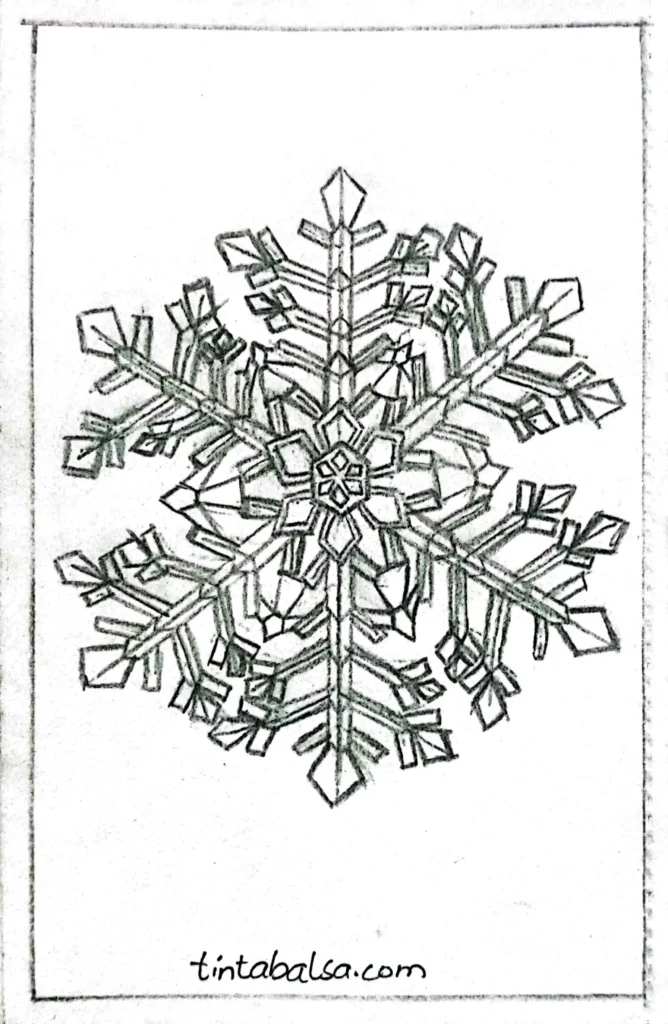
Add any final details you can think of. These finishing touches complete your snowflakes drawing, making it unique and visually appealing.
>> Draw cute, adorable Kawaii Drawings with simple, fun designs.
Conclusion
Drawing a snowflake is a simple and enjoyable process that combines creativity with the principles of fractal geometry. You can create impressive and symmetrical snowflake drawings by following a structured approach—starting with a basic framework and adding details step by step. Whether you add intricate crystalline shapes or keep it simple, the result will always be unique and visually striking. For those looking for ready-made options, premium resources like GraphicRiver and Envato Elements offer high-quality alternatives to complement your artistic projects.
FAQ: Drawing Snowflakes
1. What do I need to draw snowflakes?
To draw snowflakes, you need paper, pencil, eraser, and optional tools such as rulers or compasses for precise strokes. If you’re looking for extra detail, you can use markers, colored pencils, or digital design software for a more professional finish.
2. How can I draw a simple snowflake?
Start by drawing a vertical and horizontal line that intersect in the center. Add two diagonal lines to create a six-pointed star. Then, add details like small branches or symmetrical patterns on each arm. The key is to maintain symmetry so it looks like a realistic snowflake.
3. What techniques exist to create realistic snowflakes?
You can use techniques like pencil shading to add depth or apply watercolors for a translucent effect. In digital design, tools like Adobe Illustrator allow you to use geometric shapes and symmetry effects to create intricate snowflakes with ease.
4. Why is symmetry important in a snowflake?
Symmetry is key because real snowflakes have a hexagonal structure, with each arm mirroring the other. Maintaining symmetry in your drawing ensures that it looks natural and aesthetically pleasing.
5. What digital tools can I use to draw snowflakes?
Programs like Adobe Illustrator, Procreate, and Canva offer specific features for creating symmetrical designs. There are also free apps like Snowflake Designer that are great for beginners. These tools make it easy to experiment with patterns and colors.
6. How can I avoid mistakes when drawing snowflakes?
To avoid mistakes, start with light, soft strokes that you can easily erase. Use geometric guides to maintain proportion and review each step before adding final details. If you use digital tools, take advantage of the “undo” option to quickly correct mistakes.
7. Is it expensive to learn how to draw snowflakes?
Not necessarily. With basic paper and pencil you can start practicing without significant cost. If you decide to invest in digital tools or advanced art materials, the costs will increase, but the results will also be more sophisticated.